Showing posts with label projects. Show all posts

Monday, September 12, 2011

Frame of Mind

My roommate Emily had a great idea for a poster frame to go in the living room of our new place.  Thought I would share it here since so many people loved the Doorknob Coat Rack I did a while back.

We started with an old salvaged window.  One side of the window was an awesome reddish-brown, but we wanted the hardware to face out, so we ended up painting it.  I used some of the leftover paint from a bookcase Jason and I built.  I only put one coat on and streaked the paint a bit to let some white or chipping show through - get a bit of a distressed feel.


Once the paint was dry, we had to get the poster to lie out flat on it.  This was the scene in our kitchen for several days... see the cool color on the flip side?


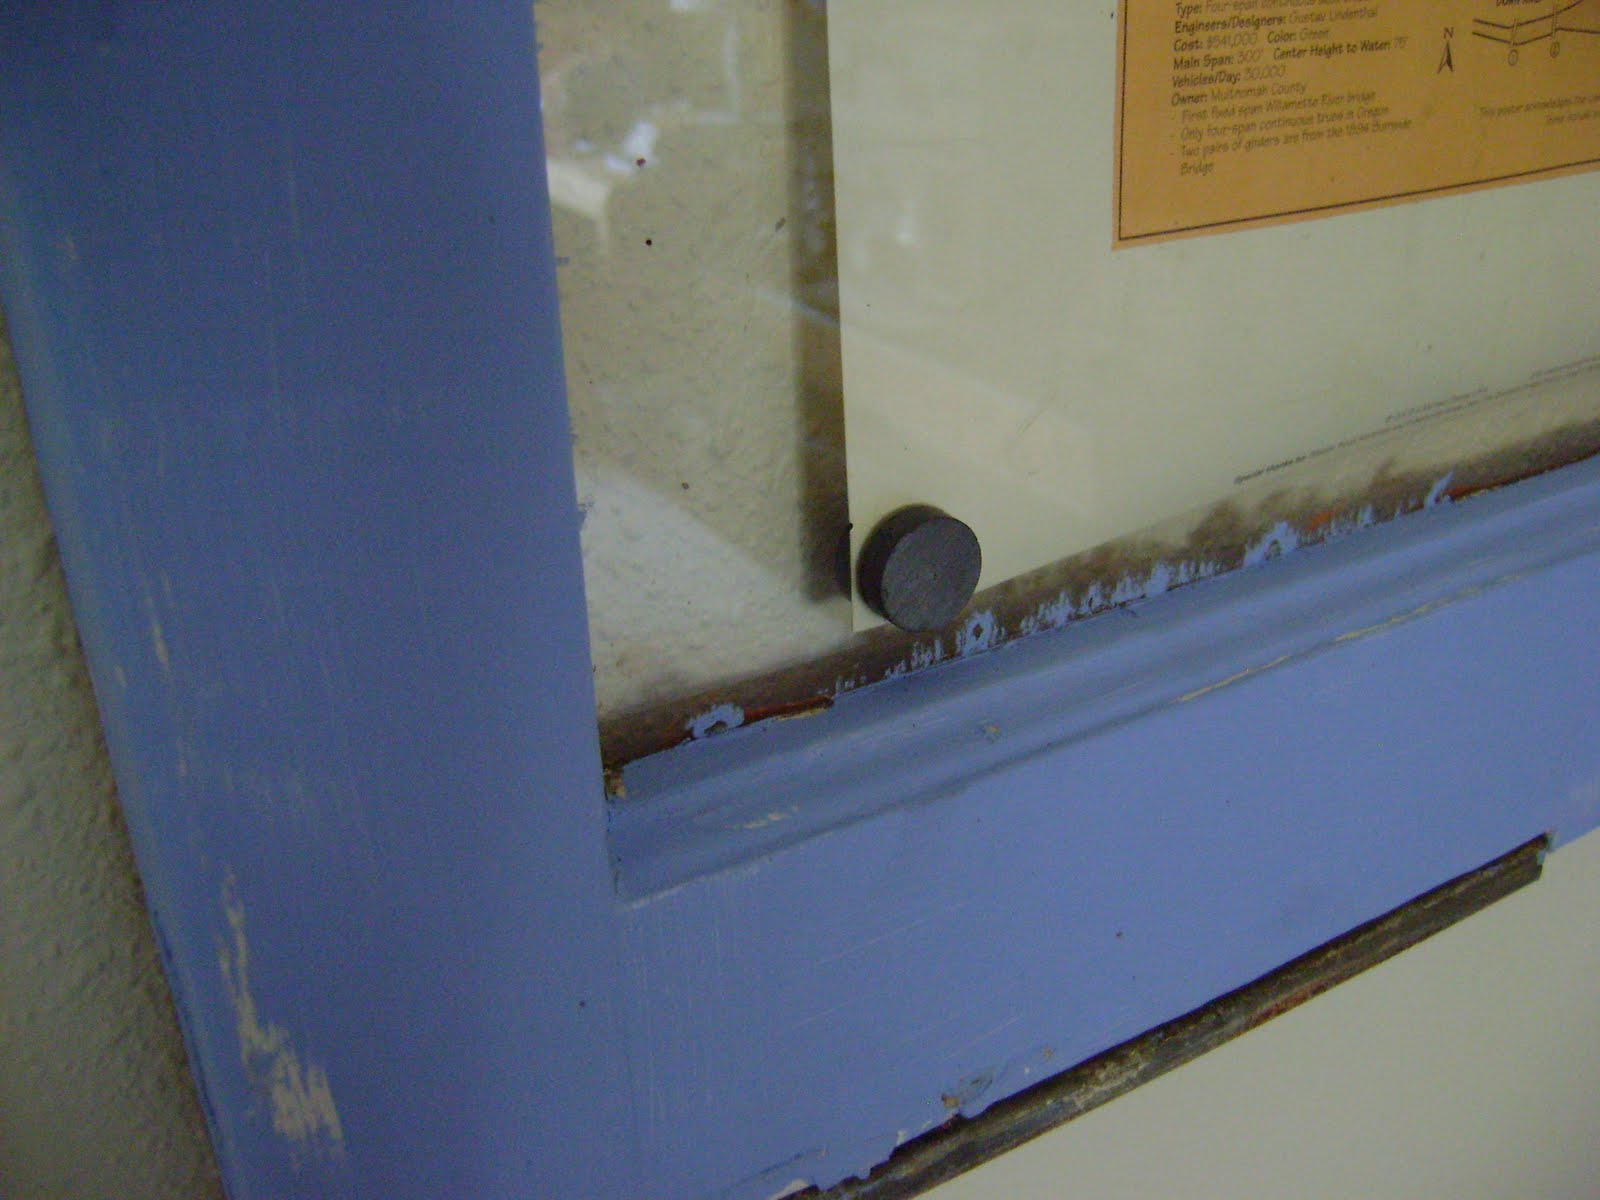
Once the poster was flat, we put magnets on both sides of the glass to hold it in place.  The poster is behind the glass to protect it.  I used some eyelet screws and wire from an art frame I reclaimed to mount the whole thing on the wall.


Couldn't resist getting my pic in here too I suppose...


Closeup shot of the magnets and some of the distressed paint.


I plan on hitting up some of the local reused and reclaimed building supply stores in order to get another window.  The plan is to get one that hangs lengthwise with another poster.  Cool matching tip - paint things that are similar but don't match the same color to bring them together visually

Monday, May 9, 2011

Recycled Candles Take Two

So I worked at a wilderness therapy program for troubled teens for some years in my life. This is what got me into things like sustainability, herbs, organics, and primitive skills. I loved being self-sustaining in the back country - living out of a backpack, making fire by rubbing sticks together, finding plants to eat in the wild. When I returned to 'civilization' I started growing veggies, making rainwater catchments, and doing a lot of things like I have been blogging about.


When I was working in the field one Christmas, we taught our kids to make candles out of bacon grease using old tuna cans and twisted juniper bark. The candles we made were small and messy, but the kids LOVED them. So when I was cleaning my kitchen this weekend and was looking at the jar of bacon grease sitting on the counter, I remembered this project and decided to embark on a little experiment.


I have a bunch of wicks left over from the recycled candle project I did a couple weeks ago, and I pulled one out and cut it to the right length to stick up out of the grease. I had to use tweezers to get it that far down into the jar. You are looking at a pint mason jar with about 1.5" of grease in it.

I was worried about what might happen when the flame burned down the wick - would the whole thing catch fire and I'd end up with a really awful mess from a bacon bomb? However, the candle burned well, and the worst thing was a slight bacon smell. Since I have no issue with the smell of bacon in my home I figure all is good in the world.

Plus it's really pretty

Friday, April 15, 2011

Recycled Candles

I love candles. Most days, the first thing I do when I get home (after putting my stuff down and greeting my dog of course) is light up a candle in the room where I am about to spend time. I find it a calming way to introduce cleansing and energy flow into my space. I also love when I light candles throughout the house. I can walk from room to room and be invited by a warm glow and pleasant smell wherever I go.

That said, candles are EXPENSIVE and they never last as long as I'd like. Plus, once the wick is gone there is still so much wax left that I feel badly tossing it. So...what does a good semi-urban homesteader do? She reuses old candles and makes them into new ones!

The process starts with wick making. Today when I got excited about making candles I was sad to learn that this process would take me about a week. So I got started as quickly as possible as the candles I have right now are getting low. I went to my local co-op and got myself a baby food jar full of borax. I got a recipe off of ehow.com - 4T of borax, 2T of salt, and 1.5 cups of warm water is all you need to get these babies started. Oh, and you need cotton string. I decided to use some of the leftover string from when I made my pea trellis.

Mix all the ingredients together and soak the string it it for 15 minutes. I was upset to see that the proportions were such that there was precipitant in the bottom of the glass. This means that the solution was saturated and no more of the solvents could be dissolved. To me that seemed a waste, and in the future I will use less of each. Perhaps when you are making your own you could add the borax and salt in proportion to one another at increments and see when you reach the saturation point. If you are dedicated enough to do that, you are certainly dedicated enough to let us know what amounts of salt and borax are actually needed for this project.


Once you have soaked your strings for at least 15 minutes, you need to hang them to dry completely. This is what takes so freaking long! The ehow article said it would take about 5 days to make sure that the strings are dried completely. This being Oregon, I decided it might not hurt to wait until the following weekend to finish the project. We shall see...

I hung the strings on the handles of my kitchen cupboards. I think it looks pretty. We shall see what kind of nuisance I have created for myself this week!


It took just shy of a week for those strings to be totally dry. I imagine that if I lived in a less humid part of the world this would not have taken as long. In the end the strings were dry, stiff, and coated with crystallized borax and salt.

The next part was the fun part! I needed to melt down my old wax so I could turn it into candles. Now let me tell you, candle wax is flammable, so you don't want to toss it into a pot on the stove. Most of the ways I know of to melt the wax call for a double boiler. Yeah...I don't have one. So what I did was place some similarly-sized, flat, river rocks in the bottom of a saucepan. The idea is that the container into which I am placing the wax does not come into contact with the burner.


I just tossed all my wax into the pot and boiled the water around it. It took about 30 minutes for all of this wax to boil. As you can see I have a couple of different colors in here. I don't actually care about the color of my candles as much as that I get flamy goodness. If you do care it should be an easy fix to just keep the colors separate.

While the wax was melting I prepped the strings for becoming wicks. I decided to hook each one onto a large safety pin. I then dipped each string into the melting wax and hung them up to dry.


Being able to just stick them into the bottom of my kitchen cabinet to hang was a nice bonus of using the pins!


The strings dried stiff and straight. Then I had to prep the wicks to be in the center of the candles when I poured them. I did this by trimming them longer than the depth of the container. I then used the stiff stickiness of the wax-covered string to bend it around stainless steel skewers. When I set the skewer down over the top of the container I could center where the string hung down.


Once the wax was totally melted I poured it into the containers. I spilled a lot which made me sad. I probably could have gotten 5 candles out of what I had, but instead I got 4.


I let the candles sit out until they were hard enough to pick up without sloshing. Then I put them in the fridge to harden faster and turned to cleaning up my mess...sigh.


Once the candles were hard I trimmed the wicks to 1/4" and lit 'em up! I think they are very pretty, and even with a big mix of colors and scents, they ended up smelling great too.


I will say the one thing I noticed is they give off a bit more smoke than store-bought ones.

Saturday, March 5, 2011

Start Shelf and Drying Rack

Happy weekend all!

With the sheet mulch out back doing its decomposing thing, I am turning my efforts to getting the starts ready to go in the ground. Despite the size of our duplex we are short on window space that works for getting plants going - not to mention that our window sills are already full of house plants, candles, and Jason's religious iconography.

One asset we do have is this wonderful set of sliding glass doors that face ESE. After a number of ideas around how to use the stationary side of these doors, I came up with an idea for a start shelf that could also be used in the summer as a drying rack.

Here are my very, very, very technical plans...


My plan was to create two 'ladders that were 2' wide that could be set up as a shelving unit, but when made with screws could be easily disassembled for travel or to use the 'ladders' as places for climbing plants. Because of the specific nature of the lumber, and the fact that we had just been up to Portland, we ended up getting the lumber at Home Depot (mild boo to us).


In my opinion the best part of all of this is that I designed the shelf, planned what lumber we needed, gave the plans to Jason, and he was able to get all the proper pieces and assemble it just as I had envisioned it. Yea me for learning how to communicate building projects! The start of the project left us with this frame that lacks the actual shelves. I was unsure what I wanted to do for the shelves, so I left them empty and looked at it in the dining room for about three weeks.

I finally began to feel edgy because I wanted to get my starts going. It is not at all usual for me to wait on a project for this long. Finally I decided to take a trip to the Benton Habitat for Humanity ReStore to gain some inspiration. In the back lot I found a shelf filled with window screens and decided that was what I would use.


What I like about it is that light can get through the screens, so there is less shade on the plants on the lower shelves. I also like that water will go through rather that sitting on a wooden plank and helping it to rot. I also realized that this would be the best way to use the shelf outdoors as a sun drying rack in the summer. What I don't like it is that the screens don't fit completely into the frame, so I lose some usable space. I am going to keep my eyes open in the future for screens that are larger.


I have been saving yogurt and other plastic containers to start my plants in. If you are in the Corvallis/Albany area and have any containers similar to ones pictured here please shoot me an email and I will come pick them up.

Tonight...I start putting seeds in soil!!!!

Wednesday, March 2, 2011

Trash (and Dirt) to Treasure

So when we moved to Corvallis we had not a stick of furniture. In our last place we picked up some cheap stuff at WabiSabi, but we decided from the get go here that anything we could build we were going to try a hand at it. Of course that went out the window once we realized it would mean we had to sit and sleep on the floor for a looooong time. Not to mention that the last place we were in was maybe 400 square feet. Now our place is 1100 - so big that to this day we have not even started to use one of the bedrooms.

So after a project where we made a bookcase by building a series of differently-sized boxes and stacking them, we decided to take on what Jason thought to be a nice, simple endeavor. Making a coffee table.

Yeah - not so easy!

The materials were mostly reclaimed. The top an old cupboard door, and legs old newel posts from The ReBuilding Center. Some of the other pieces were bought new. The plan was to build the table, and then put a cob mosaic in the top where the cupboard door is recessed.

Jason definitely struggled with putting it all together. A novice carpenter with poor tools, he came pretty close on a couple of occasions to pitching one part or another into the street. In a Facebook posting of the final product he stated "I am pretty proud of the final product. It came out quite well. I must say thanks again to Clare from preventing me from setting fire to the early process and they guy at Home Depot for the pointers."

The design is pretty basic, and he would be happy to send it to you if you were interested. Here's a pic of what it looked like after sanding, cutting, and assembling.

The next step was staining the wood. The making of the stains is in another blog posting. One thing I was surprised by was how pale the stain became once it dried.

The cob mosaic was the next step. We played with a bunch of ideas initially including broken pottery and recycled tiles, but eventually decided on river rock. Jason got the rocks while on a hike, and we set them on the table loose for day playing with design ideas until Jason came up with this one.


The cob was simple though we had to purchase the sand to make it. For those of you who don't know, cob is a mixture of clay, sand, and straw. The straw provides tensile strength, sand is used for an aggregate, and clay serves to bind it all together. It has been used to build homes and other structures for centuries. When Jason does natural building, he is most often using cob. Though the cob is poured around the stones, I will say that they were first glued down with wood glue.


Finally, I completed the project (Jason headed off to his new internship) by painting the whole thing with linseed oil to seal it. I did one coat on the wood, and two on the cob. The linseed oil strengthens and seals the cob. It also brought out the color of the stain again!

All in all it is a beautiful project!!!

Monday, February 7, 2011

Sustainable Sunday (OK - belated): The ReBuilding Center


There were doors.

Rows and rows and rows of rough-cut racks holding up doors. Interior, exterior, old, new, wooden, metal, glass...i stood in awe looking at all of them, my mind dreaming up new projects one after another.

This was the experience I had on my first visit to the ReBuilding Center in Portland. I found this nonprofit organization dedicated to recycling, waste-reduction, and art a veritable smorgasbord of reclaimed building supplies. The door-lover in me rejoiced.

The ReBuilding Center offers a number of incredible services to the Portland community. From taking donations of used building supplies, to offering demolition and reclamation services, the ReBuilding Center seeks to promote sustainability and recycling while providing people with low-cost supplies for construction. Housed on N. Mississippi, the Center is a warehouse labyrinth where one can get lost amid piles of used tile, shelves of old sinks, and stacks of lumber. Visitors are encouraged to wander through the warehouse seeking treasures. Once ready to check out, one finds an employee who assesses the wares and issues a ticket bearing prices.

The Center also offers a great number of community-building programs, events and workshops. They offer classes such as window repair or project planning, provide tours of the Center to community groups an schools, and work with local artists to raise funds through the creation of "rebuilt" furniture and auctioning off doors that have been turned into masterpieces.

On our first trip to the Center we walked away with a cupboard door and a couple of newel posts that Jason has turned into a coffee table. This weekend I purchased door knobs and a door jamb that I will be turning into a couple of coat racks. Whatever the project, large or small, a great way to find quality materials at low, low prices is to head on out to the ReBuilding Center.

I LOVE THIS PLACE!!!