I am pleased to report that I have been featured as a guest writer on a friends' blog that focuses on the wines of this lovely region - The Oregon Wine Blog. When Jason and I were down in Jacksonville visiting House Alive, we stopped in at a local wine cellar, picked up a bottle of wine, and eventually I wrote up a nice review. If you have a few minutes check it out - support another amazing blog out there!
I thought that I'd put together a simple bit explaining what makes a wine organic. Often in liquor stores (and more often in food co-ops) we will see areas designated "organic wine," but the term "organic" is often so overused that it often becomes meaningless beyond green packaging and Pollanesque supermarket pastoral. I will admit that I have not really spent time figuring it out (I generally go for local first, organic second when it comes to wine).
For starters, there needs to be an acknowledgment that along with confusion around what it means to be "organic" in our supermarkets, each country in the world has a different standard. This is important to think about when dealing with wine seeing as so much of the wine in this country is imported (other food as well). What is agreed upon across the board is that the way the grapes are grown is very important. There should be no pesticides or chemicals and all other methods of growing need to be earth-friendly.
Where things start to become hazy is the position on sulfites. Sulfites are a naturally-occurring product of fermentation, and an excellent wine preservative. However, because many people are allergic to them, in order to be considered an organic wine there can be no added sulfites. This is the US standard, so if you have a sulfite allergy be sure that the organic wine you are about to drink is domestic. That said, there is no such thing as a completely sulfite-free wine.
At Semi-Urban Homesteader (as stated earlier) we aim to make our purchases from local businesses first, organic businesses second. With fresh meats and produce we find that the two are the same, but with wine this is not always the case. Our choice is to keep money local, support family businesses, and avoid using oil through shorter shipping routes. We count ourselves lucky that when it comes to wine we are able to enjoy the bounty of the Willamette Valley - a sentiment our friends at The Oregon Wine Blog share with us!
A blog celebrating, practicing, teaching, and learning all things sustainable
Monday, February 28, 2011
Sunday, February 27, 2011
Sustainable Sunday: WabiSabi
Ok...I have a confession.
I stole the CD fish idea.
Not so much stole, as used the idea since it was taught to me. I learned it this past summer along with a bunch of other recycling-themed craft projects while working for the business we are profiling today - WabiSabi.
I spent my last summer working at WabiSabi, or Wabi for short - a nonprofit devoted to sustainability and community empowerment in Moab, UT. Wabi offers two thrift stores - the Warehouse and Thriftique - aimed at reducing the flow of goods into landfills as well as providing low-cost goods to people in a community rampant with rural poverty. The monies earned from the stores is given out to other nonprofits in the area, thus supporting their efforts throughout the county.
It's an amazing system - one I would love to see replicated across the country.
WabiSabi also puts on a series of community events, workshops, and other services. They offer the Make a Difference Grant, a twice-annual offering of money to community members who want to put on an event, workshop or project that improves life in Moab. In the summer the WabiSabi Kid's Art Tent travels to local festivals to provide recycled-themed arts and crafts projects for children (hence the CD fish). Over the holidays Wabi puts on Thanksgiving and Christmas dinners, and throughout the slow (tourist town) season, they offer a series of free Sunday brunches.
This weekend WabiSabi put on its largest annual event - the WabiSabi Fashion Show. It started nine years ago as a fundraiser promoting local artists and recycling held in a small, local, business. It has grown into a massive affair in the Spanish Trail Arena, showcasing fashion made by local artists and providing an opportunity for the community to kick back for an evening. This year's Fashion Show, themed Intergalactic, was held last night and was a wild success.
All in all, WabiSabi is an incredible example of how a business can promote sustainability and bolster its community. Next time you are traveling through Southern Utah be sure to stop in for some awesome new-to-you items!
Saturday, February 26, 2011
Juxtapositions
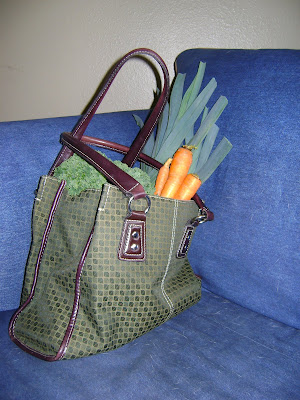
Went to the winter market this weekend here in Corvallis with my friend Matt. Lots of great produce from right here in the area despite the fact that it is February and has been COLD of late. Got home and when I went to unpack my goods I thought this image was pretty funny. Kind of embodies how I enter the world.
Happy weekend all!
Thursday, February 24, 2011
Snow Day Play
We woke up to a snowy day here in Corvallis - not something that is within the normal wintry weather. The flakes are fat and wet and accumulating on the ground as I type this.
Now I dislike snow. I grew up in the snow belt of New York state, and waking up to feet of fluffy whiteness on the ground is old hat. When I was home for the holidays it snowed EVERY DAY I was there. I found it ridiculous! Really snow is one of the things I truly complain about. Why do you think I moved to the Pacific Northwest?
That said, when we got a light dusting the other day I got a call in my office from a colleague who seemed pretty pleased with what I can only interpret as an attack of sky dandruff. She said, "when you have a four-year-old the snow becomes a wonderful gift." She described her son, nose pressed to the window of their house, asking how long it would stay and if he could go out and play with it.
Yeah, that made me appreciate the snow.
So today I figured I would celebrate another snow blessing (at least from the kid's perspective) - the snow day - by suggesting a couple of art projects that could be done with kids using old items you can find in your house.
CD Fish
Old CDs of any kind
glue (hot glue works best)
permanent markers
any kind of stiff paper
string, yarn, fishing line (You get the idea)
google-eyes, glitter (optional)
Jar Snow Globes
any kind of old jar that you have kicking around as long as it has a lid that fits tightly
glue (hot glue works best)
any kind of small plastic toy
glitter or confetti (you can make this by cutting up a potato chip bag or old mylar balloon)
paint (optional)
Now I dislike snow. I grew up in the snow belt of New York state, and waking up to feet of fluffy whiteness on the ground is old hat. When I was home for the holidays it snowed EVERY DAY I was there. I found it ridiculous! Really snow is one of the things I truly complain about. Why do you think I moved to the Pacific Northwest?
That said, when we got a light dusting the other day I got a call in my office from a colleague who seemed pretty pleased with what I can only interpret as an attack of sky dandruff. She said, "when you have a four-year-old the snow becomes a wonderful gift." She described her son, nose pressed to the window of their house, asking how long it would stay and if he could go out and play with it.
Yeah, that made me appreciate the snow.
So today I figured I would celebrate another snow blessing (at least from the kid's perspective) - the snow day - by suggesting a couple of art projects that could be done with kids using old items you can find in your house.
CD Fish
Old CDs of any kind
glue (hot glue works best)
permanent markers
any kind of stiff paper
string, yarn, fishing line (You get the idea)
google-eyes, glitter (optional)
- cut the paper to resemble different fish parts - fins, tail, etc.
- take a long piece of paper that is about 3" wide and fold it like an accordion
- lay out one CD on the table with the silver side down
- glue the fin and tail pieces to the CD so that it starts to look like a fish
- glue the string flat to the CD so that it comes out of the top of the fish
- take another CD and glue it together with the other so that both sides facing out are silver
- decorate the CDs with marker and other bits to make eyes, scales, spots - whatever you like
- take the piece of paper that is accordion-folded and thread it through the holes in the CDs
- now you have a lovely fish creation that can hang in a window!
Jar Snow Globes
any kind of old jar that you have kicking around as long as it has a lid that fits tightly
glue (hot glue works best)
any kind of small plastic toy
glitter or confetti (you can make this by cutting up a potato chip bag or old mylar balloon)
paint (optional)
- glue the toy down onto the inside of the jar so that when you screw the lid on it will be inside(be sure that the toy will fit through the jar lid before you do this)
- put 1-2 T. of glitter into the jar (use more for larger jars, less for little ones)
- fill the jar most of the way full of water (the toy will displace a bit when you put it in)
- put glue into the threads of the jar lid
- slide the toy into the jar and screw the lid on tightly
- once you have the jar sealed you can turn it over and paint a scene on the outside as well
Sunday, February 20, 2011
Putting it all Together
Now THIS is what I call a feast...
Pork chops - Jason got them in work trade from Afton Field Farm. Dredged in paprika flour and roasted in cast iron.
Potatoes - Purchased at the First Alternative Natural Food Co-op and came from Gathering Together Farm. Marinated in balsamic vinegar and roasted with rosemary, sea salt, and pepper.
Salad - Kale and carrots purchased from Denison Farms and beets from GTF gotten at the Saturday Farmers' Market. Grated and mixed with sesame and flax seeds and tossed with a honey mustard vinaigrette.
Some food needs to be celebrated don't you think?
Saturday, February 19, 2011
Sustainable Sunday: First Alternative Natural Foods Co-op
Nearly every food posting we have done includes some mention of the First Alternative Natural Food Co-op here in Corvallis. Whether baking bread, brewing kombucha, making chai, or getting our weekly groceries, we at Semi-Urban Homesteader LOVE this amazing Corvallis landmark.
The Co-op was started in 1970 by a group of 100 local citizens who wanted a source for healthy foods and the opportunity to educate others about sustainability and organic agriculture. Today it boasts over 8000 owners and two wonderful locations. Both the South (flagship) and North Co-op locations provide fresh produce, salad bar, deli items, prodigious bulk options, and high-quality natural and organic foods.
Some of our favorite Co-op features include the North Co-op's wheat grinder, South Co-op's bulk tincture selection, and both stores' ethically-sourced meat, quality wine and beer, and the "Feast Alternative" deli foods.
The Co-op does not just provide food, but events, workshops, and lectures on local issues and educational opportunities. They also work to support local business. The Local 6 program focuses purchasing efforts to buy from farms and businesses in the 6 most immediate counties around Corvallis. Currently they are earning money for local schools by dedicating a percentage of owner share monies.
All in all the First Alternative Natural Foods Co-op is an amazing example of people coming together for the health and welfare of their community.
Door Knob Coat Rack
Moving into your first unfurnished place can be challenging - it sure was for us! Fortunately, we are trying to learn as much as we can about carpentry and building, and are interested in creating a home full of recycled and reclaimed beauty.
When last in Portland I went to the ReBuilding Center and got myself the part of a door jamb that included some hardware and holes from past doors. I dug through hundreds of old doorknobs looking for eight that were different shapes and colors.
I used a circular saw to make a diagonal cut through the jamb, dividing it so that one piece was about 2/5 and the other the 3/5. Initially I was going to make one of them 3ft and one 2ft, but there was such amazing hardware and distressing on the ends and throughout that I decided just to use the whole thing.
I set the doorknobs evenly across the center of the jamb and screwed them on. I had to drill pilot holes and then hand-screw them because the phillips bit on my drill is not long enough to get around the curve of the knob.
I opted to mount them on the wall behind the front door using plastic wall mounts because the studs were hard to locate. I chose to hang them off center from one another so that the knobs were staggered for better accessibility.
I am very pleased with how the project turned out. The wall next to the bookcase was very blank, and its great to have our things up off of the floor!
Paint with all the colors of the...well, whatever
Today's project - developing and working with a natural stain. Jason has been working on a coffee table made of recycled materials, and wants to use stain made of onion skins and beets to finish it.
A while back I was in Taos, NM, and bought a book for my friends Jen and Jim - "The Natural Paint Book" by Lynn Edwards and Julia Lawless. Jen is a big book collector in the 'how-to' genre, and I liked to book a lot. At the time I was residing in Moab near my friends, and picked that book semi-selfishly so that I could borrow me.
Unfortunately the move to Corvallis made dropping in for the book a little difficult, so we procured it via Amazon. The book is a great mix of theory and practical application, and covers all kinds of paints, waxes, and stains with beautiful photos and informative text.
There are a number of ways to make wood stain from natural elements. We chose beets and onion skins because they are in season right now - not to mention that we are longing for the reddish-orange hues of the desert.
Directions are very simple. Hot water + beet or onion skin = stain. To deepen the color we steeped the onion skins overnight. For the beets we boiled them and then ran the whole thing through the blender.
The plan is to put on layers of color, adjusting the total look by putting on either the onion skin or beet stain one at a time. We have black tea on standby in case we need to brown the whole thing up.
Wednesday, February 16, 2011
Mo Mo Sheet Mulch
Our sheet mulch posting has thus far been the most visited on the blog (we are small but mighty at this point, and celebrate any page that gets more than 10 hits!) so...we decided to do a follow-up on the project with some great pics so you could see what we were up to.
We started with the frames that Jason built out of reclaimed lumber from the Benton Habitat for Humanity Store. The frames are 8'x3' and made mostly out of sections of 1"x6". We chose that size so that a) we could stand off of the beds and reach across them, and b) so we could fit them nicely into our humble backyard with room to spare for the large black raspberry bush (pictured here), and for the dog to have a play space.
You can see in the above picture that we dug into the ground in the farthest bed. This was part of the experiment that led us to choosing to sheet mulch. Once Jason got into the soil we discovered that it was too high in clay content to till and use as is. That is what led Jason to research ways to improve the soil...and voila! We discovered the sheet mulch concept. In some ways it ended up being a much better way to get going - digging up the sodden ground in the yard was the very definition of back-breaking.
Instead I spent some quality time chopping down the grass inside of each frame, first going at it with scissors, but finding my hands much more effective. Next we broke down old cardboard boxes and laid them on top of the grass clippings like so. Make sure if you are doing so that the paper and boxes are wet.
Next came the really fun part. I don't think had anyone asked Jason or I five years ago if we thought we'd ever haul around goat poop that we would have said yes. However, there we were in the Pacific Northwest drizzle team-carrying Tupperware totes filled with partially composted goat manure, straw, and sawdust.
Sheet mulching is composting in place, so it is necessary to alternate layers of green matter (for nitrogen) and brown matter (for carbon) in order to start the microorganism frenzy leading to decomposition. It is important to note that all dead, organic matter will break down eventually. Organizing compost in this way simply serves to accelerate the process.
After spreading poop came the straw cover and a layer of topsoil made of mostly-composted fir trees - a great way to take advantage of the byproducts of the local lumber industry.
Finally we capped the beds with a layer of leaves. It is important to have a layer that is free of seeds and will block sunlight from the other layers to hamper weed growth.
In the end we created 96 square feet of raised-bed garden in about 2 hours. We are now rooting for the rainy season to help accelerate the decomposition while we prepare our starts indoors.
Love on the Week of Valentines
So apparently we here at Semi-Urban Homesteader (read - Jason and myself), were not able to get our acts together for a Valentine's Day posting...BUT we decided that a continuation of the love was totally appropriate. Who does not love the extension of their birthday through belated cards and gifts?
We wanted to highlight the business and places we LOVE because of their commitment to sustainability/permaculture and their outright coolness.
Afton Field Farm
Approvecho
Cob Cottage Company
Community Rebuilds
Corvallis Brewing Supply
Corvallis-Albany Farmers' Markets
Earthship
Earthwork with Frank Grinrod
First Alternative Natural Foods Co-op
House Alive
Lost Valley Education Center
Moonflower Market
Natural Building Network
Ojai Foundation
ReBuilding Center
Sol Food Farms
Toby Hemenway
WabiSabi
White Oak Farm and Education Center
Wilderness Awareness School
Youth Garden Project
If you have places you love, please post the links in the comments section!
Sunday, February 13, 2011
Sustainable Sunday: Afton Field Farm
We want to profile an amazing business that Jason visited this week - Afton Field Farm. While chatting about local sustainable agriculture with a pal from Corvallis Brewing Supply, Jason learned that Tyler and Alicia Jones of Afton Field Farm followed in the practice of one of Jason's agricultural heroes, Joel Salatin, owner of Polyface Farms. Jason and I both read about Salatin and his "grass farming" ways in Michael Pollan's book, "The Omnivore's Dilemma." Jason learned that Tyler had apprenticed with Salatin and was eager to see the sustainable farming guru's methods put into practice in real life.
Afton Field Farm is self-described as "a pasture-based, beyond organic, multi-generational family farm in Corvallis, Oregon." Their website boasts a wide variety of meats and other animal products including beef, chicken, pork, eggs, and turkey. Customers can make purchases right at the farm, at local farmers' markets, or in a myriad of regional and local restaurants and grocers.
The Jones' are very welcoming of visitors, having an open farm policy Monday-Saturday. All they ask is that people give a call before arrival so they they know someone is coming. Jason sent them an email and was invited to come by on Wednesday afternoon.
Happy pig out on the farm (picture from Alicia's blog)
Jason found the Jones' very friendly. They offered him a view of the farm from up on top of a hill and were apologetic that winter is a slow time with less to observe. Jason enjoyed seeing the pigs who were hanging out near the orchard. He also saw the laying hens in the coop, and the 'fleet' of eggmobiles in the field housing the broilers. He was able to see their new slaughter house where they prepare chickens for sale.
Jason found the experience to be inspiring and exciting. Not only did he get to meet an incredibly cool young couple who share our ideals, but also walked away with pork chops, bacon, a roast, and plans to return for eggs at $4.00/doz. The best part of his experience was being able to actually see the innovative methods that he'd only until then read about.
We are currently thawing the roast for dinner tonight, and will update you with a review.
Saturday, February 12, 2011
Sheet Mulch
So its time for us to actually start that whole gardening thing. We spent some time talking, dreaming, scheming about it about 2 weeks ago, and now we are finally getting it to action.
We decided to put in 4 framed beds out back - each is 8'x3' and made out of reclaimed lumber we got from the Benton Habitat for Humanity ReStore. Jason worked this week getting the frames built, and we are going to spend some time this weekend turning the ground and starting to get things ready for seeds.
Upon digging into the yard (thanks to our landlady who is OK with this!) we found that the soil is mostly clay. This is great when we are talking about making plasters or cob, but for gardening it worried us a bit, hence the framed beds so we can import some other materials without having to till up the whole yard.
We looked into ways to get ahold of good soil. This included all kinds of ideas from going to the woods and getting some to purchasing it at a local store. We decided hauling soil seemed pretty energy inefficient and labor intensive, and discovered the route of buying soil would put us out over $200 minimum (ouch). So Jason got on the horn and started researching other options.
What he landed on was sheet mulching. This was an idea he'd originally had, but rejected because he did not think it was feasible for immediate planting. Sheet mulching is an incredible soil-building technique, especially if you have 6 months to let it break down. Fortunately, Jason pursued this idea deeply enough to discover that it is possible to plant almost immediately if one takes certain steps.
Lets take a moment and talk about what sheet mulching actually is. It is rooted in the concept that tilling is actually not beneficial for sustainable gardening (or agriculture for that matter) in that it will initially promote plant growth, but in the long run leeches nutrients out of the soil and leaves in barren (anybody remember the dust bowl?). It is essentially composting in place. To do this we are going to:
While Jason builds his 5-layer dip of poop and other organic material in the backyard, I have been saving old containers to get our starts going. The plan is to get the sheet mulch up and decomposing while the plants get rolling indoors. Stay tuned for an article on starting plants as well as updates on the backyard beds. We are slated to get our plants into the ground on April 15, thus turning tax day into happy-gardening-fun-plant-dirt-day.
We must certainly give a nod to Toby Hemenway, author of "Gaia's Garden" for inspiration, ideas, plans, and instruction.
We decided to put in 4 framed beds out back - each is 8'x3' and made out of reclaimed lumber we got from the Benton Habitat for Humanity ReStore. Jason worked this week getting the frames built, and we are going to spend some time this weekend turning the ground and starting to get things ready for seeds.
Upon digging into the yard (thanks to our landlady who is OK with this!) we found that the soil is mostly clay. This is great when we are talking about making plasters or cob, but for gardening it worried us a bit, hence the framed beds so we can import some other materials without having to till up the whole yard.
We looked into ways to get ahold of good soil. This included all kinds of ideas from going to the woods and getting some to purchasing it at a local store. We decided hauling soil seemed pretty energy inefficient and labor intensive, and discovered the route of buying soil would put us out over $200 minimum (ouch). So Jason got on the horn and started researching other options.
What he landed on was sheet mulching. This was an idea he'd originally had, but rejected because he did not think it was feasible for immediate planting. Sheet mulching is an incredible soil-building technique, especially if you have 6 months to let it break down. Fortunately, Jason pursued this idea deeply enough to discover that it is possible to plant almost immediately if one takes certain steps.
Lets take a moment and talk about what sheet mulching actually is. It is rooted in the concept that tilling is actually not beneficial for sustainable gardening (or agriculture for that matter) in that it will initially promote plant growth, but in the long run leeches nutrients out of the soil and leaves in barren (anybody remember the dust bowl?). It is essentially composting in place. To do this we are going to:
- Trim the grass short, leaving it in place.
- Covering the grass with newspaper and cardboard to prevent grass growth.
- Layering on top of the paper and cardboard from the bottom up, these four layers: partially composted goat manure and straw from a local farm, completed compost from the local municipality, straw, and dead leaves.
While Jason builds his 5-layer dip of poop and other organic material in the backyard, I have been saving old containers to get our starts going. The plan is to get the sheet mulch up and decomposing while the plants get rolling indoors. Stay tuned for an article on starting plants as well as updates on the backyard beds. We are slated to get our plants into the ground on April 15, thus turning tax day into happy-gardening-fun-plant-dirt-day.
We must certainly give a nod to Toby Hemenway, author of "Gaia's Garden" for inspiration, ideas, plans, and instruction.
Monday, February 7, 2011
Sustainable Sunday (OK - belated): The ReBuilding Center
There were doors.
Rows and rows and rows of rough-cut racks holding up doors. Interior, exterior, old, new, wooden, metal, glass...i stood in awe looking at all of them, my mind dreaming up new projects one after another.
This was the experience I had on my first visit to the ReBuilding Center in Portland. I found this nonprofit organization dedicated to recycling, waste-reduction, and art a veritable smorgasbord of reclaimed building supplies. The door-lover in me rejoiced.
The ReBuilding Center offers a number of incredible services to the Portland community. From taking donations of used building supplies, to offering demolition and reclamation services, the ReBuilding Center seeks to promote sustainability and recycling while providing people with low-cost supplies for construction. Housed on N. Mississippi, the Center is a warehouse labyrinth where one can get lost amid piles of used tile, shelves of old sinks, and stacks of lumber. Visitors are encouraged to wander through the warehouse seeking treasures. Once ready to check out, one finds an employee who assesses the wares and issues a ticket bearing prices.
The Center also offers a great number of community-building programs, events and workshops. They offer classes such as window repair or project planning, provide tours of the Center to community groups an schools, and work with local artists to raise funds through the creation of "rebuilt" furniture and auctioning off doors that have been turned into masterpieces.
On our first trip to the Center we walked away with a cupboard door and a couple of newel posts that Jason has turned into a coffee table. This weekend I purchased door knobs and a door jamb that I will be turning into a couple of coat racks. Whatever the project, large or small, a great way to find quality materials at low, low prices is to head on out to the ReBuilding Center.
I LOVE THIS PLACE!!!
Saturday, February 5, 2011
Different Spokes
Ha! My friend just moved to Seattle and found a cycling group that goes by the title name of this post.
I looooove cycling. I still think back on my first bike, a purple and white beauty with tassels, a basket, and unicorn stickers. My dad ran alongside me down a little grassy hill to get me the momentum and confidence to wobble a few good pedal-pushes before realizing he'd let go and tumbling to the ground.
Corvallis is a delightfully cycle-friendly town. There are bike lanes, bike shops, and bike racks all over the place. It's to the point that when I turn down a street without a designated place to ride I am surprised and quickly change streets (I suppose the city planners want it that way). Though I would ultimately like to move out of town and into a quieter, more open space, I do enjoy the fact that pretty much all of Corvallis is easily accessible by bicycle.
So I have opted to be a bike commuter.
I have done so before with mixed results. When living in Washington I cycled to meetings around campus, but on the warmer days I found that I sweat too much on the hills to arrive at business meetings sans stinkiness. When I lived in Moab the commute was flat, but the 110 degree weather made me HATE the outdoors (and I really did not think I COULD hate the outdoors).
Jason and I did cycle-tour New Zealand and had an amazing experience...here's a pic of my setup from there. The trailer sucked.
So with the new year and new place to live combined with a commitment to live as closely to my value system as possible, I have made one choice that will force me to at the least ride my bike to work and back - I have not purchased a parking pass for campus.
I have been at work for a week, and certainly am enjoying the decision. Its nice to have fifteen minutes to myself on the way to and from my new job. I enjoy the feeling of filling my lungs early in the morning with cool air, and seeing the sunset glowing on the horizon on my way home. My ride is about 2.5 miles each way, relatively flat, and only goes through a few major intersections. There are lots of other people out on their bikes as well, and we all smile at one another as we pass as if we are sharing some great secret that only the cyclists will understand. i see more, feel more, exercise more, and save on gas. After returning from Jacksonville last weekend I have used my car once.
Until then - happy riding to all!
PS - we are taking homemade chili to the Superbowl party tomorrow. Go Pack!!!
I looooove cycling. I still think back on my first bike, a purple and white beauty with tassels, a basket, and unicorn stickers. My dad ran alongside me down a little grassy hill to get me the momentum and confidence to wobble a few good pedal-pushes before realizing he'd let go and tumbling to the ground.
Corvallis is a delightfully cycle-friendly town. There are bike lanes, bike shops, and bike racks all over the place. It's to the point that when I turn down a street without a designated place to ride I am surprised and quickly change streets (I suppose the city planners want it that way). Though I would ultimately like to move out of town and into a quieter, more open space, I do enjoy the fact that pretty much all of Corvallis is easily accessible by bicycle.
So I have opted to be a bike commuter.
I have done so before with mixed results. When living in Washington I cycled to meetings around campus, but on the warmer days I found that I sweat too much on the hills to arrive at business meetings sans stinkiness. When I lived in Moab the commute was flat, but the 110 degree weather made me HATE the outdoors (and I really did not think I COULD hate the outdoors).
Jason and I did cycle-tour New Zealand and had an amazing experience...here's a pic of my setup from there. The trailer sucked.
So with the new year and new place to live combined with a commitment to live as closely to my value system as possible, I have made one choice that will force me to at the least ride my bike to work and back - I have not purchased a parking pass for campus.
I have been at work for a week, and certainly am enjoying the decision. Its nice to have fifteen minutes to myself on the way to and from my new job. I enjoy the feeling of filling my lungs early in the morning with cool air, and seeing the sunset glowing on the horizon on my way home. My ride is about 2.5 miles each way, relatively flat, and only goes through a few major intersections. There are lots of other people out on their bikes as well, and we all smile at one another as we pass as if we are sharing some great secret that only the cyclists will understand. i see more, feel more, exercise more, and save on gas. After returning from Jacksonville last weekend I have used my car once.
Me on a ride with my old club in Utah.
I do need to work on a couple of things. At the moment I am riding my Novara, which is my road bike. It's not really meant for commuting - no fenders, no panniers or racks, and it needs tuning more often than something built for rattling over rough sidewalks and potholes. I am on the lookout for an old road bike like the one I rode in New Zealand that I can deck out with lights, fenders, and containers to hold my stuff (saw one setup recently made out of old cat little boxes that I want to emulate). I also hear that campus is a bad place to have a nice bike because of theft. So...we shall see. Am combing Craigslist often and waiting to pounce.That said, I live in the Pacific Northwest, and have been incredibly lucky that my commutes have not been wet. I have enjoyed dry commutes for the first 7 days since I started working. Yesterday the clouds rolled in and I know that the honeymoon will end. There will be days when the water sprays into my face from my tires and passing cars, my fingers stiff from cold and my eyes burning when I wonder "why did I choose this???"
Yeah it's not all puppy dogs and rainbows, bunny rabbits and roses, BUT the benefits far outweigh the drawbacks. I save money and gas on my already fuel-efficient vehicle. I get 30 minutes of built-in exercise per day AT LEAST. I see the world around me and miss less because I am not whizzing by. I get discounts at local businesses for 'alternative commuting.' I save money on a parking permit for campus.
Plus - I feel good about myself!
Until then - happy riding to all!
PS - we are taking homemade chili to the Superbowl party tomorrow. Go Pack!!!
Subscribe to:
Posts (Atom)